Wall-hung trash cans are a perfect solution for those who want to save space and keep their surroundings clean and organized. There are different types of wall-hung trash cans available in the market, varying in materials, sizes, shapes, and colors. In this article, we will highlight the features of these trash cans, making it easy for consumers to choose the best option for their needs. Additionally, we will discuss the benefits of using a wall-hung trash can, such as preventing odors and improving hygiene. Finally, we will provide a step-by-step guide on how to install a wall-hung trash can, including the tools needed, the location to place the can, and how to secure it properly to avoid accidents.


Features of Wall-Hung Trash Cans
When it comes to wall-hung trash cans, there are several key features to consider. The first feature to look at is the material used. Wall-hung trash cans are commonly made of stainless steel, plastic, or aluminum. Stainless steel trash cans are durable and resistant to corrosion, making them a great option for both indoor and outdoor use. Plastic trash cans, on the other hand, are lightweight and easy to clean, making them a practical choice for kitchens and bathrooms. Aluminum trash cans are also durable and lightweight, perfect for heavy-duty use in commercial settings.
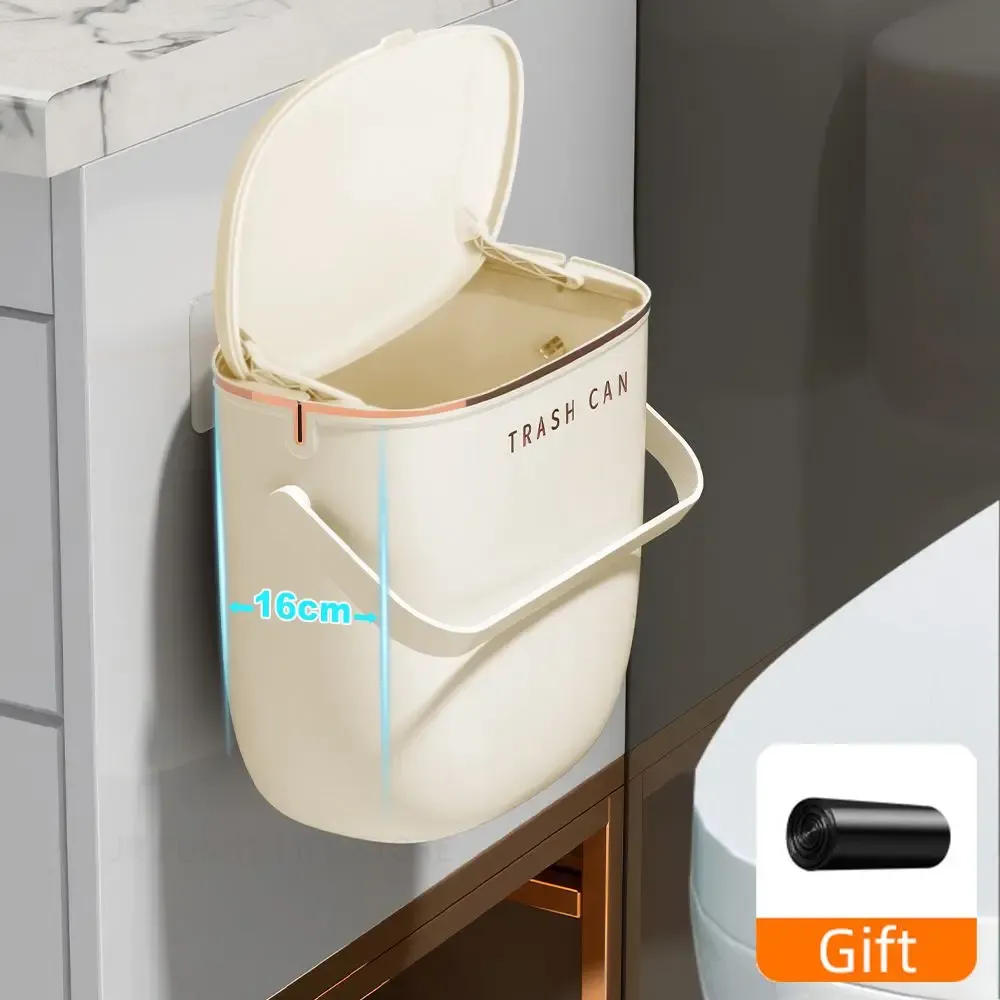
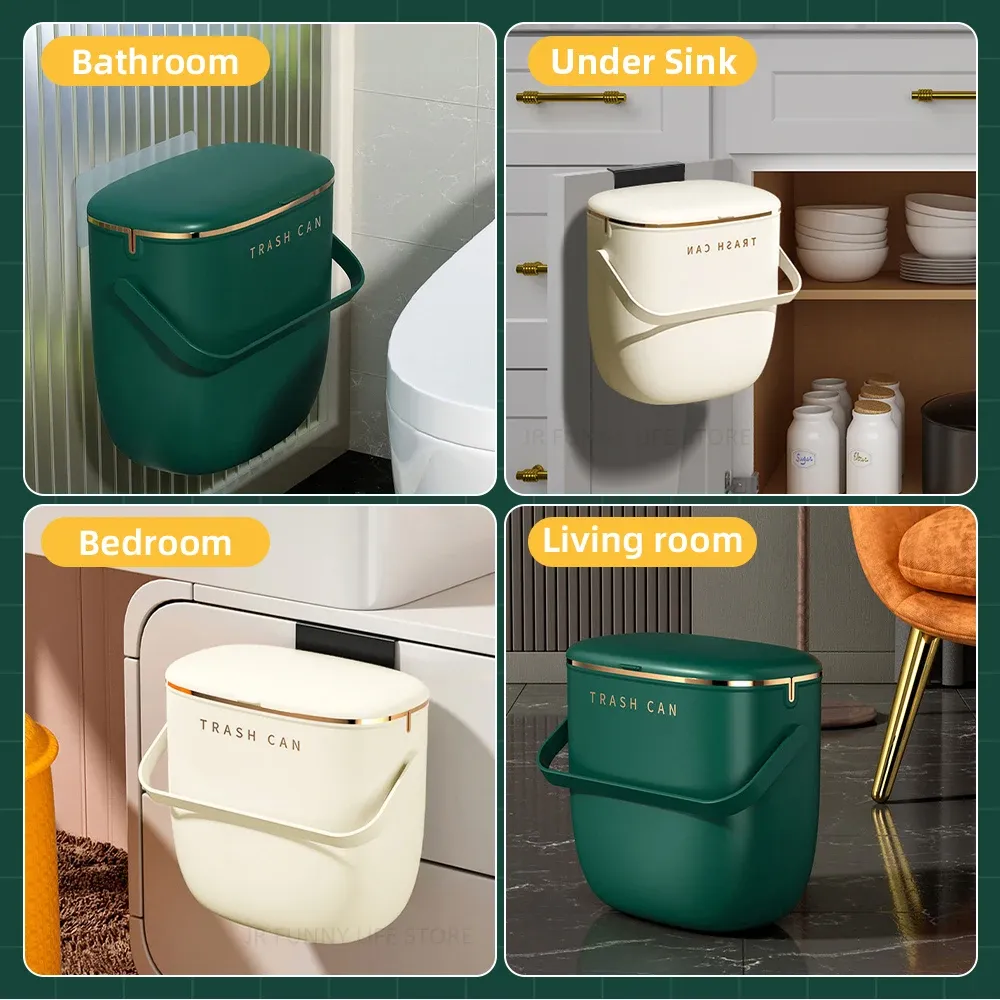
In addition to the material, the size and shape of the wall-hung trash can are important factors to consider. Wall-hung trash cans come in various sizes to accommodate different volumes of waste. For smaller spaces, a compact and slim design is ideal, while larger spaces may require a bigger capacity trash can. The shape of the trash can is also important, as it should fit seamlessly into the designated space without obstructing movement or causing inconvenience.
Furthermore, color is another feature that can add to the aesthetic appeal of the wall-hung trash can. Consumers can choose from a wide range of colors to match their existing decor or create a contrasting statement piece. From classic black and white to bold and vibrant hues, there is a color to suit every preference and style.
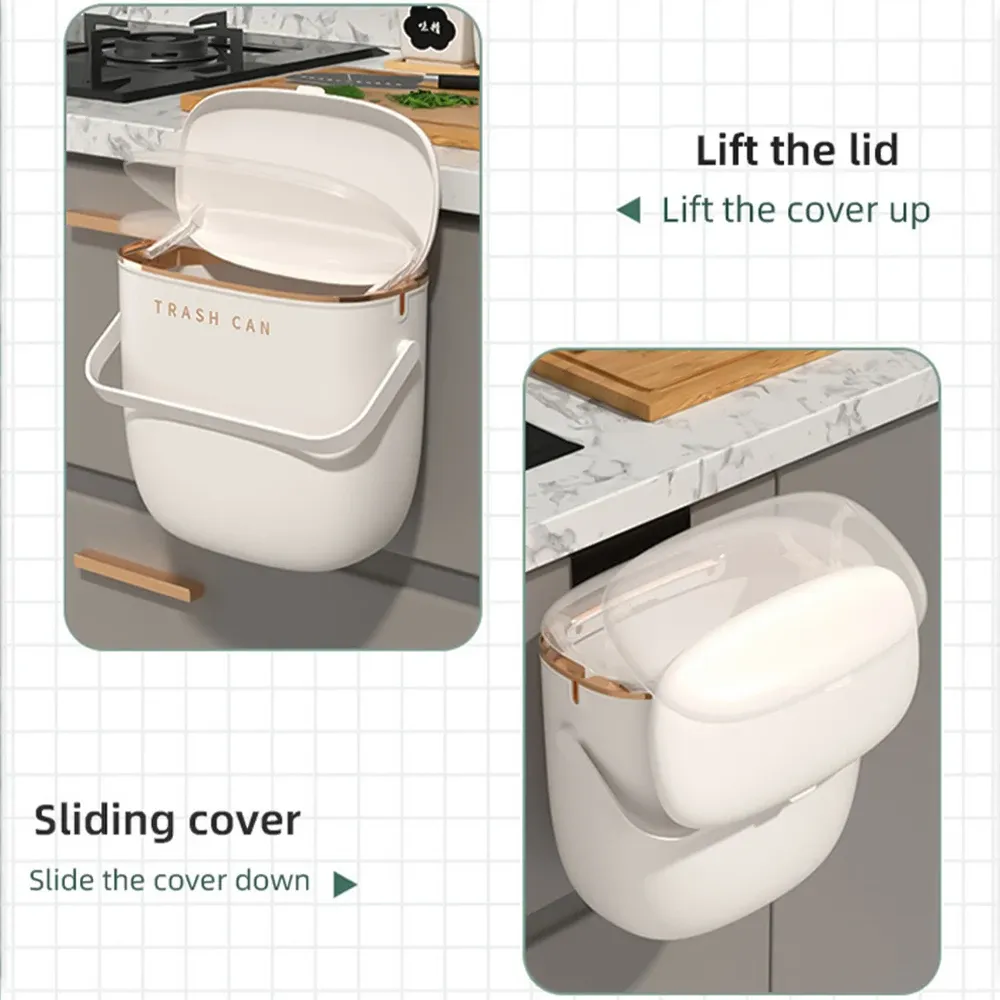
It’s important to note that some wall-hung trash cans come with additional features such as odor control mechanisms, hands-free operation, and liners for easy disposal. These extra features can enhance the functionality and convenience of the trash can, making it a more valuable investment for the consumer.
Benefits of Using a Wall-Hung Trash Can
One of the primary benefits of using a wall-hung trash can is its space-saving design. By mounting the trash can on the wall, you free up valuable floor space, making it ideal for small kitchens, bathrooms, or other tight spaces. This allows for greater flexibility in the layout of the room and ensures that the trash can is out of the way, reducing the risk of accidents or obstructions. Additionally, a wall-hung trash can eliminates the need for a traditional freestanding bin, which can be bulky and take up valuable space in smaller areas.
Furthermore, wall-hung trash cans help to maintain cleanliness and organization in the surrounding area. With the trash receptacle off the ground, there is less risk of spills, leaks, or pests getting into the trash. This not only keeps the area looking neat and tidy but also reduces the amount of time and effort required for cleaning and maintenance. Additionally, the elevated position of the trash can makes it easily accessible, allowing for effortless disposal of waste without the need to bend down or reach into a concealed cabinet.
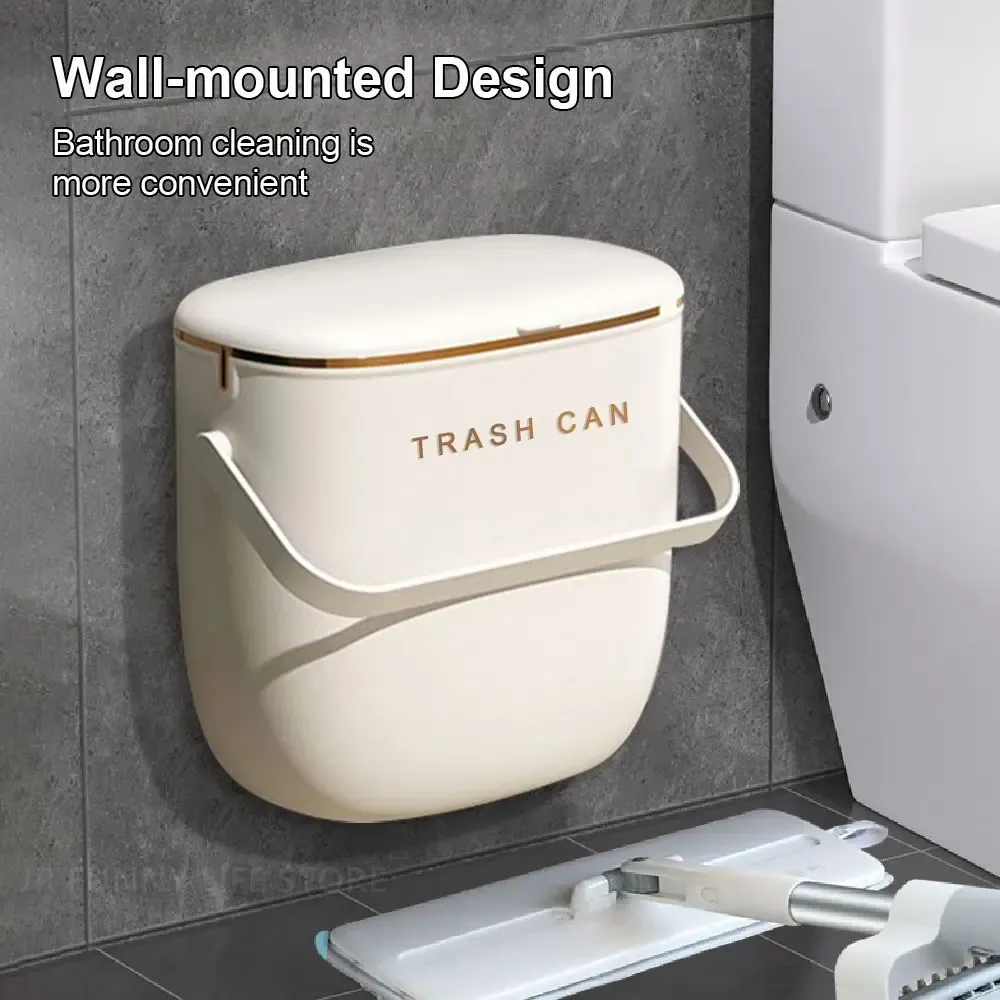
In addition to space-saving and cleanliness, wall-hung trash cans also aid in preventing odors and improving hygiene. The enclosed design of these trash cans helps to contain unpleasant smells, especially when compared to open-top bins. This is particularly beneficial in the kitchen, where food waste can quickly become malodorous if not properly contained. Moreover, by keeping the trash off the floor, wall-hung trash cans reduce the risk of contamination from bacteria or other pathogens, promoting a healthier and more hygienic environment.
Installation Process
Before beginning the installation process, gather all the necessary tools. You will need a drill, screws, wall anchors, a measuring tape, a pencil, and a level. Ensure that you have all these tools before proceeding with the installation process.
Step 1: Choose the location
The first step in installing a wall-hung trash can is to choose the location where you want to place it. This location should be easily accessible and should not obstruct any walkways or doorways. It is important to consider the design of the room and the functionality of the trash can when choosing the location.
Step 2: Mark the location
Once you have chosen the location, mark the spot where you will be installing the trash can using a measuring tape and a pencil. Use the level to ensure that the markings are straight and even.
Step 3: Drill holes
Next, use your drill to make pilot holes where you marked the location. If the wall is made of drywall, use wall anchors to reinforce the holes and prevent them from expanding. If the wall is made of concrete or brick, use masonry screws instead of wall anchors to secure the trash can.
Step 4: Install the mounting bracket
After drilling the holes and inserting the wall anchors, it’s time to install the mounting bracket. The mounting bracket is what holds the trash can in place. Attach the mounting bracket to the wall using screws.
Step 5: Attach the trash can
Once the mounting bracket is securely attached to the wall, attach the trash can to the bracket. Line up the holes on the back of the trash can with the holes on the mounting bracket, then screw in the screws to attach the trash can to the bracket.
Step 6: Test the installation
Finally, test the installation by placing some trash in the can and checking if it stays securely in place. Make sure that the can is at a comfortable height for use and that it is easy to access.
In conclusion, installing a wall-hung trash can may seem daunting, but with the right tools and guidance, it can be done easily. By following this step-by-step guide, you can safely install a wall-hung trash can and enjoy its space-saving benefits. Whether it is for your home or office, a wall-hung trash can is a practical and convenient solution to keeping your environment clean and organized.
FAQ
Q1. What are the benefits of using a wall-hung trash can in small bathrooms and kitchens?
A wall-hung trash can provides an ideal solution for those who have limited floor space. By hanging the trash can on the wall, it frees up the precious floor space that can be used for other essential items. With its compact design, it is perfect for small bathrooms and kitchens. Additionally, it helps keep the area clean and organized as the trash can is out of reach of children and pets.
Q2. Can wall-hung trash cans hold bulky items?
Wall-hung trash cans come in various sizes, and some models are designed to hold larger items. It’s important to check the product specifications and capacity before purchasing one to ensure it meets your specific needs. However, it’s generally recommended to avoid disposing of bulky items such as food waste in wall-hung trash cans to prevent overflow or damage to the container.
Q3. How do you install a wall-hung trash can?
The installation process may vary depending on the brand and model of the wall-hung trash can. Typically, it involves drilling holes into the wall, attaching the mounting bracket, and then securing the trash can onto the bracket. It’s essential to follow the manufacturer’s instructions carefully to ensure proper installation and stability.
Q4. Are wall-hung trash cans easy to clean?
Most wall-hung trash cans are made of durable materials that are easy to clean. Many models feature removable inner buckets that make disposing of waste and cleaning the trash can more convenient. It’s recommended to clean the trash can regularly with mild soap and warm water to maintain its hygiene and prolong its lifespan.